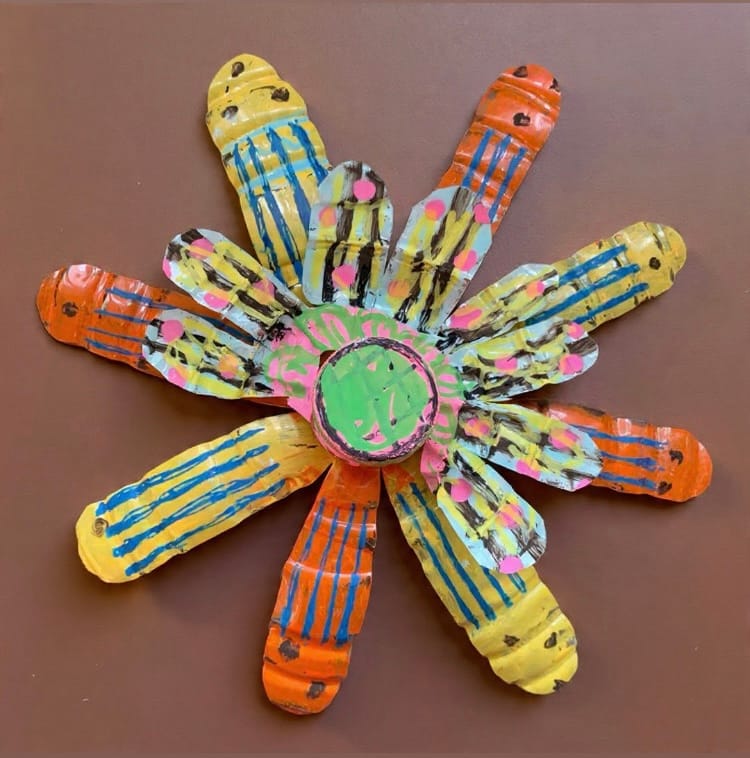
Recycled Bottle Flower: Turning Trash into Bold Sculptural Blooms
If you’re looking for a project that blends sustainability, sculpture, and design thinking — this recycled bottle flower is a classroom favorite.
It’s bold.
It’s textural.
It transforms something ordinary into something surprisingly beautiful.
And students LOVE using materials that would normally go straight into the recycling bin.

Why This Project Works
This lesson is about more than cutting up plastic bottles.
It invites students to:
- Think like designers
- Experiment with radial symmetry
- Explore texture and layering
- Reimagine “waste” as possibility
- Practice careful cutting and craftsmanship
It’s art and environmental awareness woven together.
Materials
- Clean plastic bottles (clear or colored)
- Scissors (strong ones for thicker plastic)
- Permanent markers or acrylic paint
- Cardboard circle base
- Glue (hot glue works best if teacher-assisted)
- Optional: wire, brads, or staples for structure
Step-by-Step: How to Make a Recycled Bottle Flower
1️⃣ Cut the Petals
Cut off the base of the bottle.
Then cut vertical slits upward to create petal strips.
The bottle cap is the center of the flower.
Students can:
- Keep petals straight
- Round the edges
- Point them
- Curl them outward for dimension
This is where design decisions begin.
2️⃣ Shape & Layer
Gently bend petals outward to create form.
For more complex flowers:
- Cut multiple bottle sections
- Layer them
- Rotate for visual rhythm
Talk about:
- Radial balance
- Overlapping shapes
- Positive and negative space
3️⃣ Add the Center
Draw or paint the bottle cap to resemble the center of a flower.
Students can:
- Add drawn texture
- Cross-hatching
- Pattern
- Dots or stripes for contrast
Encourage intentional color choices.
4️⃣ Assemble
Glue the petals to a cardboard base in a circular formation.
Layer additional pieces on top for dimension.
This is where it really starts to feel sculptural.
5️⃣ Add Color & Detail
Students can:
- Use acrylic paint for bold coverage
- Add marker patterns
- Scratch lines into paint for texture
- Hot glue a stick to the back for the stem (optional)
Bright contrasting colors make these flowers pop.
Teaching Connections
This project opens up so many conversations:
🌎 Sustainability and creative reuse
🎨 Radial symmetry and design principles
🔍 Texture and surface experimentation
💡 Transforming materials through imagination
You can connect it to:
- Environmental studies
- STEAM design challenges
- Botanical observation
- Cultural floral motifs from around the world
Classroom Tip
Pre-cutting thicker bottles for younger students helps.
Older students can handle full construction independently.
And always remind them:
Plastic edges can be sharp — slow and careful cutting wins.
The Bigger Idea
Projects like this remind students that art isn’t just about beautiful materials.
It’s about seeing potential.
When a student holds up a finished flower and says,
“Wait… this was just a bottle?”
That’s the moment.
That’s creative thinking in action.