Art + Science: Watercolor Rain Cloud Craft with Salt & Tassel Rain
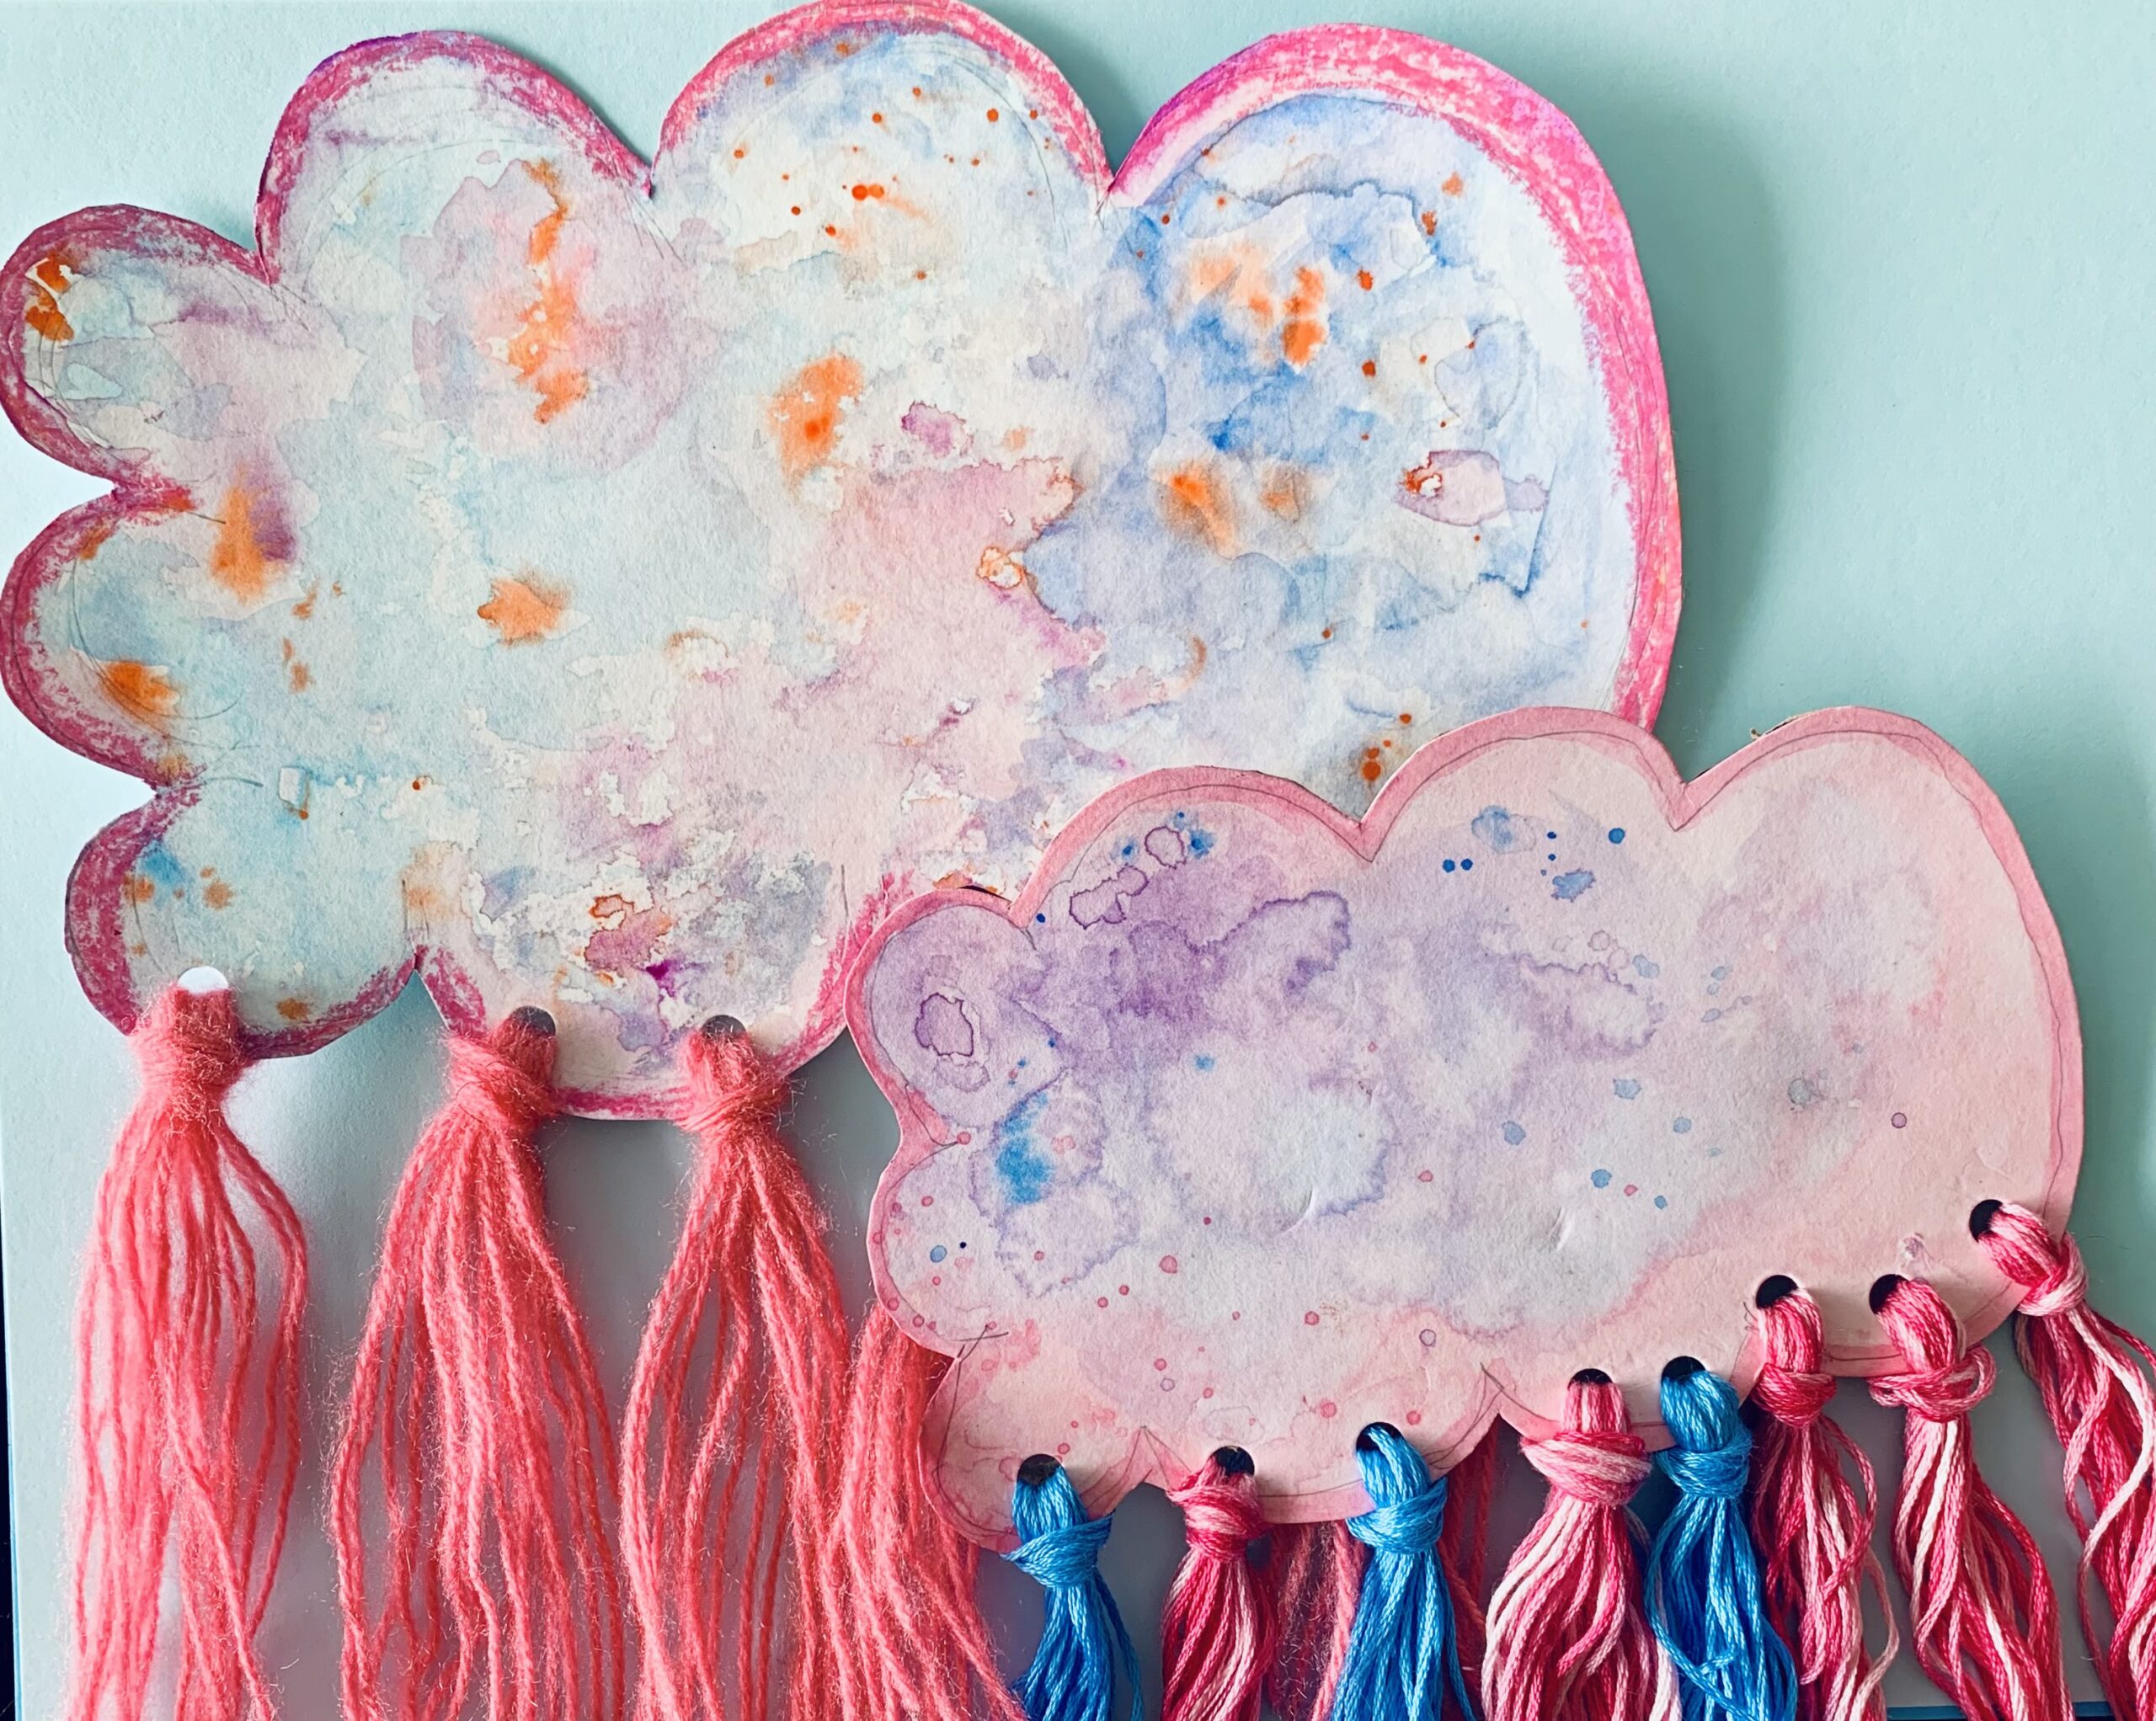
Looking for a creative way to combine art and science in your classroom or at home? This watercolor rain cloud craft is a beautiful and engaging way for kids to explore weather systems while experimenting with watercolor techniques. The magic of salt on watercolor brings clouds to life with texture, and the yarn or ribbon tassels give this project a playful, 3D “rainfall” element.
What You’ll Need:
Art Supplies:
- Watercolor paper or thick cardstock
- Watercolor paints (blue, gray, purple, etc.)
- Paintbrushes
- Water cups & paper towels
- Table salt or kosher salt
- Scissors
- Glue, tape or hole punch
- Yarn, ribbon, or embroidery floss (for tassels)
Optional Science Connection Materials:
- Weather chart or visual of the water cycle
- Picture books or a short video on cloud formation and precipitation
Step-by-Step Instructions:
1. Paint the Cloud
Start by having kids draw a simple cloud shape on watercolor paper. They can go freeform or use a template. Fill the cloud shape with different shades of blue, gray, and purple watercolor paint. While the paint is still wet, sprinkle salt over the surface. The salt will absorb some of the pigment and water, creating a crystal-like, stormy cloud texture. Let it dry completely before brushing the salt away.
2. Talk About the Science
While the clouds are drying, take a moment to discuss how clouds form. Tie in how water vapor condenses into water droplets around dust particles in the atmosphere – a concept that’s visually reinforced when kids see how salt interacts with watercolor on their painted clouds. Discuss types of clouds and how rain forms through accumulation and gravity pulling water droplets down.
3. Make the Rain Tassels
Cut strands of yarn, ribbon, or embroidery floss to create rain tassels. You can group 3–5 strands and knot them at the top to create a small tassel effect. These can represent falling rain. For a little added flair, you can even use metallic or iridescent ribbon to mimic glistening raindrops.
4. Attach the Rain
Once the cloud is dry, kids can glue, tape or tie their tassels to the back of the cloud, letting them hang down like rain. Add as many or as few as they like. This is a great opportunity to talk about different amounts of rainfall and the way precipitation varies depending on weather patterns.
Learning Tie-Ins:
Art Techniques:
- Watercolor blending
- Salt texture effect
- Color mixing for mood (stormy vs. calm clouds)
Science Concepts:
- The water cycle
- Cloud formation and precipitation
- Observation of natural patterns
Wrap-Up Idea:
Have students present their clouds to the class or family, describing the kind of weather their cloud represents. Did they make a light rain cloud, a thunderstorm, or a gentle drizzle? Encourage them to use new vocabulary from your weather lesson.
Vocabulary:
- Sunny, cloudy, windy, foggy, humid, weather, raining, hot, cold, lightning, hurricane, drizzle, thunderstorm, nimbus, precipitation, gravity
Bonus Extension:
Display the clouds hanging from the ceiling or on a bulletin board titled “Forecast: Creative Skies Ahead!” — a perfect blend of science and art to brighten any space.


