Seeing Like an Impressionist: Crayon Sketchbook Studies
Painting with Crayons, Pastels, Dashes & Dots
Some art lessons unlock a brand-new way of seeing.
This week, Impressionism did exactly that.

I brought in a handful of landscape reference photos — scenes filled with shimmering water, trees dancing in sunlight, and wide skies full of colour.
Before we even began, students noticed something:
“These pictures look fuzzy… but also detailed!”
“Yes! That’s the magic.”

🎨 What Is Impressionism? (Kid-Sized Explanation)
We learned that Impressionism began in France over 150 years ago.
Artists like Claude Monet, Berthe Morisot, and Camille Pissarro stopped painting inside studios and went outdoors to capture:
- Light changing during the day
- Reflections in water
- Wind moving through trees
- Shadows that aren’t just black — they’re colourful!
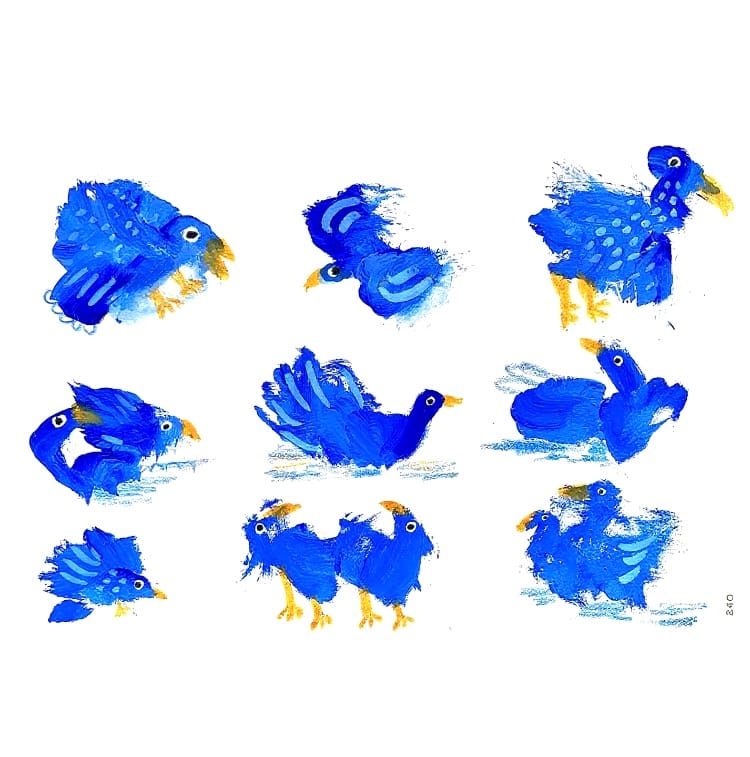
Instead of smooth blending, Impressionists used:
- dabs
- dots
- dashes
- layered colour
When you step back — the eye mixes the colours for you.
Cue the gasp:
“So they didn’t blend everything?!”
Exactly.
🎨 ACTIVITY: Impressionist Landscapes with Crayon + Dry Brush
Goal: Create a landscape showing light, colour, and movement using Impressionist marks.
✏️ Materials
- Landscape reference photos
- Crayons or oil pastels (soft pastels also work!)
- A small stiff dry brush
- Fingers (nature’s blending tool!)
- Heavy paper or sketchbooks
🪄 Step-by-Step
1. Choose a Landscape (2 min)
Students choose or are assigned a photo — lakes, rivers, fields, mountains, gardens, sunrise/sunset.
2. Sketch Lightly (2–3 min)
A quick outline — horizon, land shapes, sky.
Nothing detailed!
3. Dashes, Dots & Layering (8–10 min)
Students begin filling space using short marks, not coloring in solid blocks.
Encourage:
- Sky + water → horizontal dashes
- Trees + grass → upward strokes or dots
- Shadows → colours like blue, violet, green (not black!)
4. Layer Colour (5–7 min)
Add new colours on top, not instead of:
- Yellow over green
- Blue over purple
- Peach or white highlights
5. Blend… But Not Everywhere (5–7 min)
Using:
✨ fingers
✨ the dry brush
Lightly soften some areas:
- Sky gradients
- Water reflections
- Soft edges
Leave others unblended, so the marks shine through.
Students quickly see:
Texture = movement.
6. Leave Specks of Paper Uncovered
This is the Impressionist secret weapon.
Tiny spots of white paper → sparkles of sunlight, especially:
- On ripples of water
- On leaves
- On bright clouds
Suddenly their page glows.
7. Final Look + Step Back (2–3 min)
When students stand 3 steps back, they notice:
- Colours mixing just by looking
- Light appears without painting light itself
Magic.
🌟 What We Learned Together
Students discovered that:
- Colour doesn’t need to be smooth to be beautiful
- Marks can show movement — wind, water, sunlight
- Shadows are colourful, not dull
- The space you don’t cover can be just as powerful as what you draw
One student said,
“It looks weird close up, but perfect far away!”
Another whispered,
“The dry brush is like a little wind.”
And just like that — they understood Impressionism.
🌈 Why Impressionism Belongs in Every Art Room
This lesson gives children:
- Confidence to be loose instead of “perfect”
- Permission to experiment
- A bridge between drawing and painting
- A new way of seeing colour in the real world
And maybe, like Monet, they’ll start noticing:
✨ Purple shadows on the sidewalk
✨ Pink sunlight on a tree
✨ Blue in the clouds
Because art doesn’t just change how kids make —
it changes how they see.